No artificial colors, no mysterious chemicals—just pure, wholesome ingredients you can pronounce
There's something magical about gummy candies. Those colorful, chewy little treats have been delighting taste buds for generations. But have you ever flipped over a package of store-bought gummies and tried to decipher the ingredient list? It reads like a chemistry experiment: artificial colors, high-fructose corn syrup, mysterious additives with numbers instead of names, and preservatives you'd need a science degree to understand.
What if I told you that making your own gummies at home is not only possible but surprisingly simple? And that the homemade version tastes even better than what you'd buy at the store? Today, I'm sharing everything you need to know about creating delicious, natural gummy candies in your own kitchen.
The Case for Homemade Gummies
Before we dive into the recipe, let's talk about why making your own gummies is worth the small effort involved.
Health Benefits You Can Actually See
When you make gummies at home, you're in complete control. You choose real fruit juice instead of artificial flavoring. You decide how much sweetener to add, allowing you to reduce sugar significantly compared to commercial versions. You eliminate all those synthetic dyes and preservatives that offer no nutritional value and may cause sensitivities in some people, especially children.
Perfect for the Whole Family
Homemade gummies aren't just healthier—they're incredibly versatile. Pack them in lunchboxes for a special treat kids will love. Keep them in the fridge for afternoon snacks when energy levels dip. Use them to satisfy sweet cravings in a more mindful way. They're also fantastic for parties, holiday gifts, or as a fun weekend activity with children who love helping in the kitchen.
The Joy of Customization
Once you master the basic technique, the possibilities become endless. Want tropical mango gummies? Done. Craving tart raspberry treats? Easy. Prefer less sweetness? Simply adjust. You can even create layered gummies with different flavors or add fun textures with fruit pieces. The kitchen becomes your candy laboratory, and you're the creative director.
It's Actually Fun
There's something deeply satisfying about watching liquid transform into those perfect little shapes. Kids are mesmerized by the process, and it's a wonderful opportunity to teach them about cooking, chemistry, and making healthier food choices. Plus, the house smells amazing while you're making them.
Everything You'll Need
Yields approximately 30 small gummies (depending on mold size)
Essential Ingredients
- 200 ml natural fruit juice: This is your flavor foundation. Choose 100% pure juice without added sugars—orange, strawberry, blueberry, apple, grape, pomegranate, or any combination you love. Freshly squeezed juice works beautifully, or you can use store-bought varieties as long as they're pure juice
- 2–3 tablespoons sweetener: Honey adds a lovely depth of flavor, brown sugar provides a subtle molasses note, or use maple syrup, agave, or even regular sugar. The amount depends on your juice's natural sweetness and your personal preference
- 2 heaping tablespoons unflavored gelatin: This is approximately 14 grams and the magic ingredient that gives gummies their characteristic texture. Make sure it's unflavored—you want your fruit juice to shine through
Optional Additions That Elevate Everything
- Fresh lemon juice: Just a few drops can transform your gummies by brightening the flavors and adding complexity
- Fruit purée: Blending in some mashed banana, mango, or strawberries creates a thicker texture and intensifies the fruit flavor. This also adds natural fiber
- Superfood boosters: Consider adding a small amount of spirulina for green gummies packed with nutrients, or a touch of beet powder for natural coloring
Equipment
- Silicone molds: These are key for easy unmolding and creating fun shapes. Look for small cavities—bear shapes, hearts, stars, or simple squares all work wonderfully
- Small saucepan: For heating your mixture gently
- Wooden spoon or whisk: For stirring
- Small pitcher or kitchen syringe: Makes filling molds much easier and cleaner, though you can also use a spoon carefully
Step-by-Step Instructions for Perfect Gummies
Step 1: Create Your Flavor Base
Begin by choosing your juice. If you're using fresh fruit, now's the time to blend it with a bit of water to reach the 200 ml mark. Strain it if you prefer a smoother texture, or leave some pulp for rustic gummies with more fiber.
If you're incorporating fruit purée, mix it thoroughly with your juice at this stage. The purée adds body and creates a more substantial gummy with richer fruit flavor. A ripe banana blended with apple juice, for example, creates creamy, kid-friendly gummies. Mango with orange juice offers a tropical treat. Let your imagination guide you.
Step 2: The Blooming Process
This step is crucial for achieving the right texture. Pour your juice into a small saucepan—it should be cold or at room temperature, never hot. Evenly sprinkle the gelatin powder over the entire surface of the liquid. Don't stir! This is important.
Let the mixture sit completely undisturbed for 5 full minutes. During this time, the gelatin granules absorb the liquid and swell up, a process called "blooming." You'll notice the surface takes on a wrinkled, solid-looking appearance. This ensures the gelatin will dissolve smoothly and completely without clumps.
Step 3: Gentle Heating Is Key
Place your saucepan over the lowest heat setting your stove offers. This is where patience becomes important. The mixture must not boil—high heat destroys gelatin's gelling properties, leaving you with gummies that never quite set properly.
Stir gently but continuously with a wooden spoon or whisk. You'll see the solid gelatin gradually melt into the juice, creating a smooth, homogeneous liquid. This usually takes 3-5 minutes. The mixture should steam gently but never bubble vigorously.
Once the gelatin has completely dissolved—check carefully that no granules remain—add your chosen sweetener. Stir until it's fully incorporated. This is your moment to taste and adjust. Remember that sweetness perception diminishes slightly when foods are cold, so your mixture can taste slightly sweeter now than the finished gummies will taste.
Step 4: Filling Your Molds
Remove the saucepan from heat immediately. Working fairly quickly (the mixture starts thickening as it cools), pour it into your silicone molds. A small pitcher gives you good control, while a kitchen syringe offers precision for tiny molds. Fill each cavity to the top—the gummies won't rise or expand.
If small bubbles form on the surface, you can gently tap the mold on the counter to release them, or carefully pop them with a toothpick for a smooth finish.
Let the filled molds sit at room temperature for about 10-15 minutes. This initial cooling prevents condensation from forming when you transfer them to the refrigerator.
Step 5: The Waiting Game
Transfer your molds to the refrigerator and let them set for at least 2-3 hours. For best results, leave them overnight. The gummies should feel completely firm and spring back when touched lightly.
Step 6: Unmolding and Finishing Touches
Once fully set, gently push each gummy from the bottom of the mold. They should pop out easily—this is why silicone molds are perfect for this project.
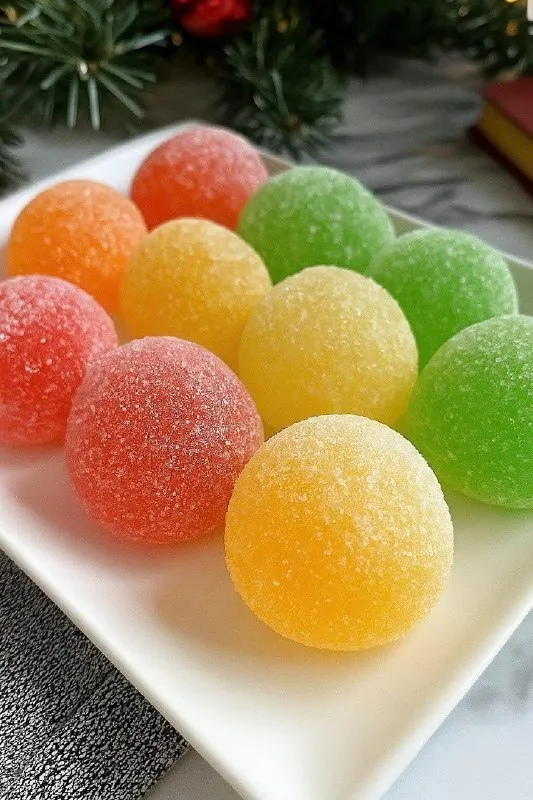
For traditional candy-store appeal, roll your gummies in a light coating. Granulated sugar creates a sweet outer shell and prevents sticking. Shredded coconut offers a tropical twist. For sour gummies that rival any store-bought version, toss them with citric acid (available in the baking aisle or canning section). You can also leave them completely plain.
Storage and Shelf Life
Store your homemade gummies in an airtight container in the refrigerator. They'll keep beautifully for 5-7 days, though they rarely last that long! Keep them cool—warmth will soften gelatin-based gummies.
If you're gifting them, add a note mentioning they need refrigeration and should be consumed within a week.
Troubleshooting Common Issues
Gummies won't set: You may have used too little gelatin or boiled the mixture. Try adding an extra half tablespoon of gelatin next time, and watch your heat more carefully.
Too rubbery: Too much gelatin creates an overly firm texture. Reduce by a teaspoon or two in your next batch.
Stuck in molds: Ensure molds are completely clean and dry before filling. You can also lightly spray them with neutral cooking oil, though this usually isn't necessary with quality silicone.
Creative Variations to Try
Once you've mastered the basic recipe, explore these fun variations:
- Layered gummies: Let one color set partially, then add a different flavor on top
- Embedded fruit: Place a small piece of real fruit in each mold before pouring
- Herbal infusions: Steep hibiscus or chamomile tea, then use as your liquid base
- Probiotic boost: Stir in probiotic powder after removing from heat
- Vegan version: Replace gelatin with agar-agar powder (use about 1 teaspoon per 200ml liquid, and note that it requires boiling to activate)
Final Thoughts: A Sweet Choice You Can Feel Good About
Making homemade gummy candies represents something bigger than just a recipe. It's about taking control of what goes into your body and your family's bodies. It's about choosing real ingredients over artificial ones. It's about proving that healthier choices don't require sacrifice—these gummies are genuinely delicious.